
Continuous Data Import from External Apps

This guide shows you how to import data from an external app and keep it up-to-date in your app. To make this guide specific, we will import Users, but you can use the same approach for any other type of data.

Data Source

First, create a Universal Data Source that points to Users in every app you want to import users from.
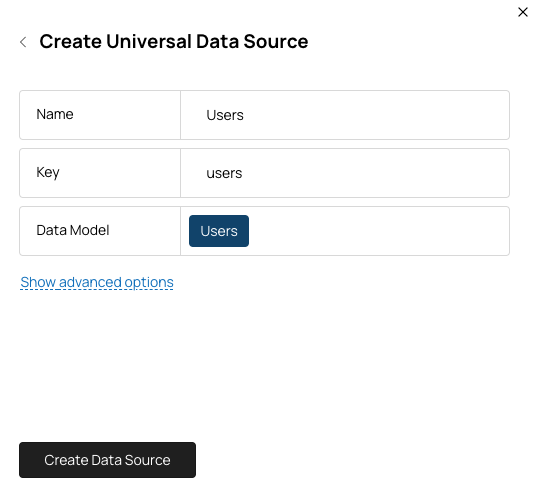
Continuous Data Import illustration
Or via the API:
curl -X POST "https://api.getmembrane.com/data-sources" \
  -H "Authorization: Bearer $MEMBRANE_ACCESS_TOKEN" \
  -H "Content-Type: application/json" \
  -d '{"name": "Users", "key": "users", "udm": "users"}'
By selecting the Users data model, you instruct Membrane to automatically pick the most appropriate data collection in each external app this Data Source is used for.

Field Mapping

To keep field mapping configuration in one place and let your tenants change it if needed, create a Field Mapping. Select the Users data source you created in the previous step. You can leverage Universal Data Models to pre-populate mappings for standard fields across all applications.
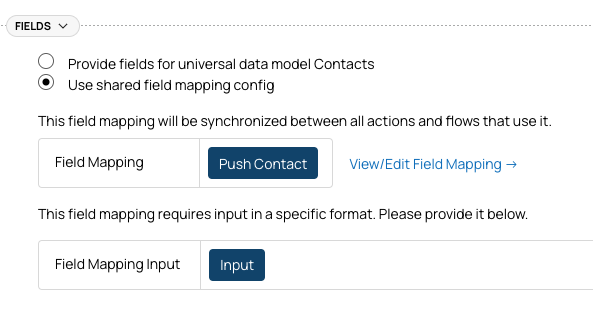
Continuous Data Import illustration
Or via the API:
curl -X POST "https://api.getmembrane.com/field-mappings" \
  -H "Authorization: Bearer $MEMBRANE_ACCESS_TOKEN" \
  -H "Content-Type: application/json" \
  -d '{
    "name": "Import Users",
    "key": "import-users",
    "dataSourceKey": "users",
    "direction": "import",
    "defaultImportValue": {
      "id": { "$var": "$.id" },
      "name": { "$var": "$.fullName" }
    }
  }'

Full Data Import

To perform the initial import of all users from the external app (and full re-imports in the future if you need to), use the list-data-records action type. 
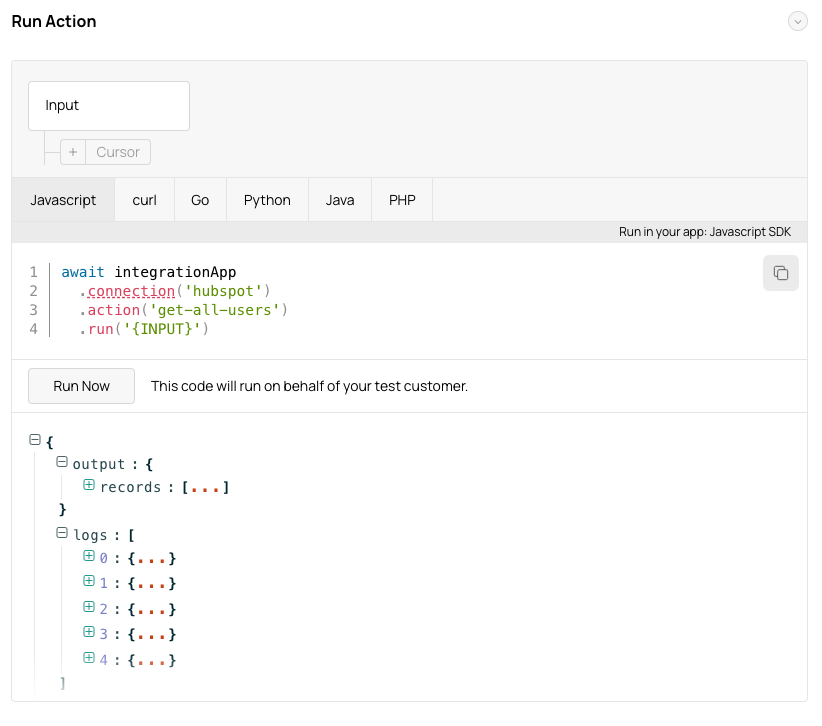
Create an action in the Console or via the API:
Continuous Data Import illustration
curl -X POST "https://api.getmembrane.com/actions" \
  -H "Authorization: Bearer $MEMBRANE_ACCESS_TOKEN" \
  -H "Content-Type: application/json" \
  -d '{
    "name": "Get All Users",
    "key": "get-all-users",
    "type": "list-data-records",
    "inputSchema": {
      "type": "object",
      "properties": {
        "cursor": { "type": "string" }
      }
    },
    "config": {
      "dataSource": { "key": "users" },
      "fieldMapping": { "key": "import-users" },
      "pagination": { "cursor": { "$var": "$.input.cursor" } }
    }
  }'
Let’s break it down. Data Source Select the Users Data Source you created in the first step. You will re-use this data source in the following steps, so it’s good to keep it consistent. Pagination If an external application has a lot of users, this action will return users page by page. Each response will contain a 
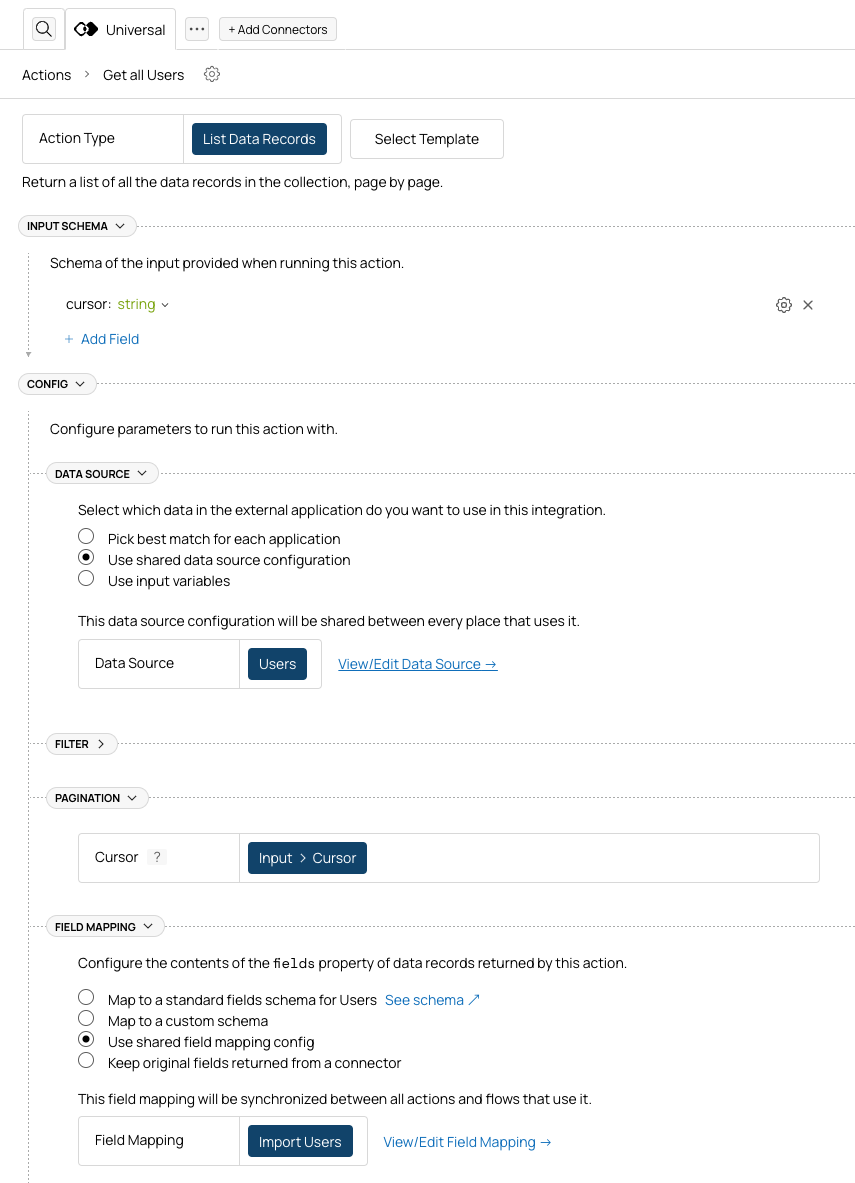
cursor that you can use to fetch the next page. To make it work, you need to:
  • Add cursor to the input schema of the action.
  • Use cursor in the pagination config of the action.
Field Mapping Select the Import Users field mapping you created in the second step. This will ensure that the data you receive is mapped consistently to your data schema across different blueprints. Running the import Run the action via SDK to import all users, handling pagination:
let cursor: string | undefined
do {
  const result = await membrane.action('get-all-users').run({ cursor }, { connectionId: '<connectionId>' })
  // result.records is an array of mapped user objects
  for (const user of result.records) {
    await saveToMyDatabase(user) // { id, name }
  }
  cursor = result.cursor
} while (cursor)
Or test in the Console:
Continuous Data Import illustration

Incremental Data Import

To receive incremental updates from external apps, create a Flow triggered by change events in the Users data source. The flow will look like this:
Continuous Data Import illustration
It will be triggered by 
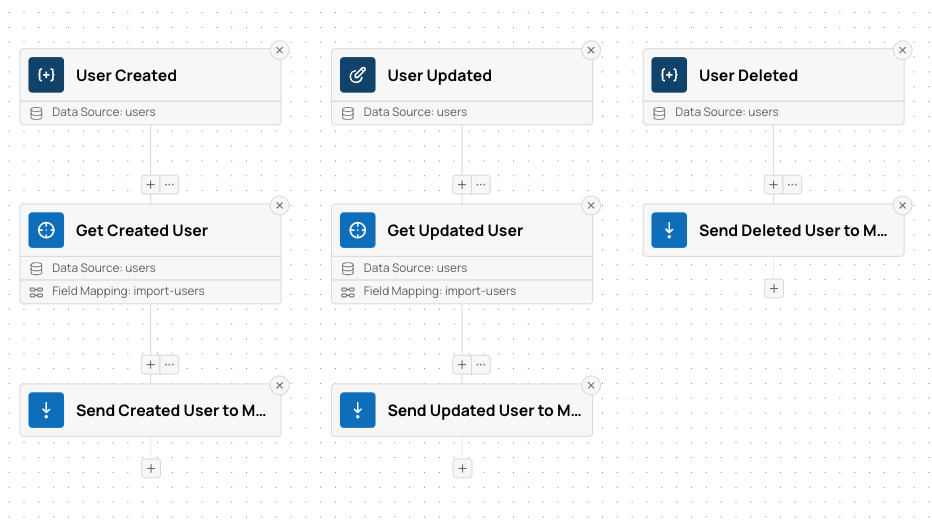
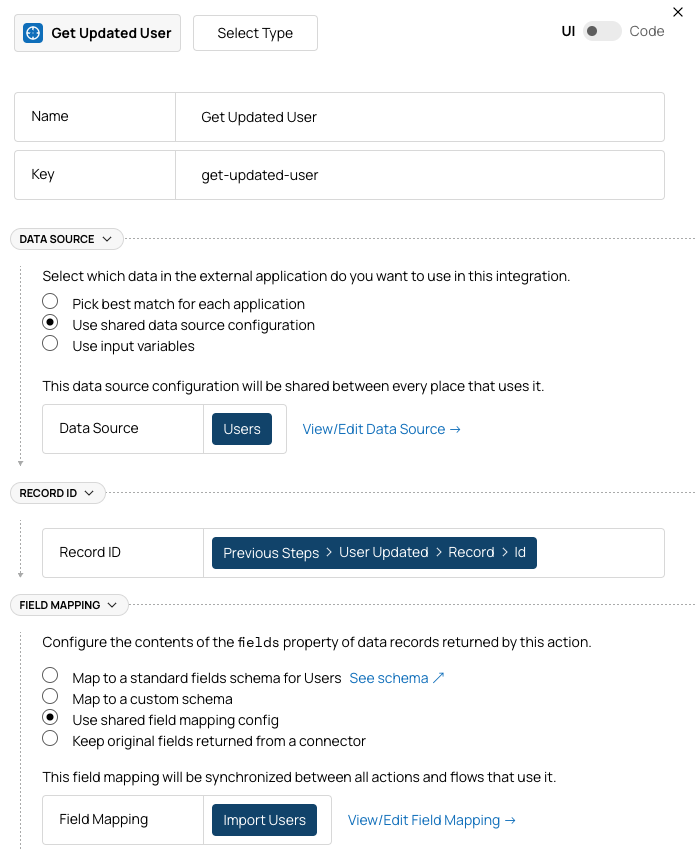
data-record-created, data-record-updated, and data-record-deleted events in the Users data source.
Then it will fetch the full user record (except for deleted users) and send them to your application.
The step that fetches the user record will look like this:
Continuous Data Import illustration
It uses the same Data Source and Field Mapping as in the “Get All Users” action above. The step that sends users to your app looks like this:
Continuous Data Import illustration
It simply sends the user record to the URL specified by you in the body of the POST request. Testing To test this flow, apply it to an external app you have an account in, create a connection, and make a change in one of the users: create, update, or delete it.
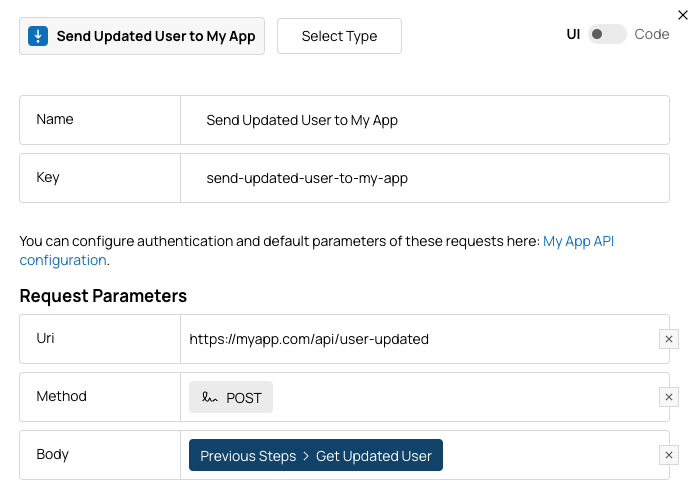
You should see a flow run and a request sent to the URL you specified.

Extending Functionality

There are many things you can add to the basic functionality described here:
  • To configure requests made to your app (add authentication, etc), see Connecting Your App API.
  • Use Field Mappings UI to let your users customize how fields are mapped from the external app to your app.
  • Internal Data Schemas will let you define custom per-tenant field schemas that will be used in the field mapping.
  • If you want to not just import data, but send updates back, check out Bi-Directional Sync.

Live Examples